

Who does this?? Well, apparently I do. Fortunately my dad knows his stuff when it come to electrical work. He is my hometown's power and light superintendent. However, he lives across the country so while he could talk me through it, it was ultimately Eric or I who had to fix it.
He told me what I needed to know and talked me through replacing the outlet. It was a little stressful as I know nothing about that kind of stuff, but it turned out to be very simple and straightforward.
Here are the steps:
1) Shut off power to the circuit you will be working on. Our circuit box is in our laundry/utility room.
1) Shut off power to the circuit you will be working on. Our circuit box is in our laundry/utility room.
On the door of the circuit box, each room was labeled with a number.

Here is switch 23 turned off.

The outlet I replaced is called a GFCI outlet which I easily found at my local hardware store.

2) Take off face plate. Unscrew the screws of the face plate with a flat-head screwdriver.
3) Pull out the outlet. Unscrew top and bottom screws from outlet, and gently pull out the outlet.
Here is my broken outlet pulled away from the wall.

My outlet had three wires attached to it:
- Black wire = live wire. These are usually attached to the outlet by gold or brass colored screws.
- White or gray wire = neutral wire. These are usually attached to the outlet by silver colored screws.
- Green or bare wire = ground wire. This is usually attached to the outlet by a green screw.
4) Remove outlet. Loosen each screw that holds a wire. Once removed it looked like this. You can see the gray wire, black wire, and the bare wire which is the ground wire.

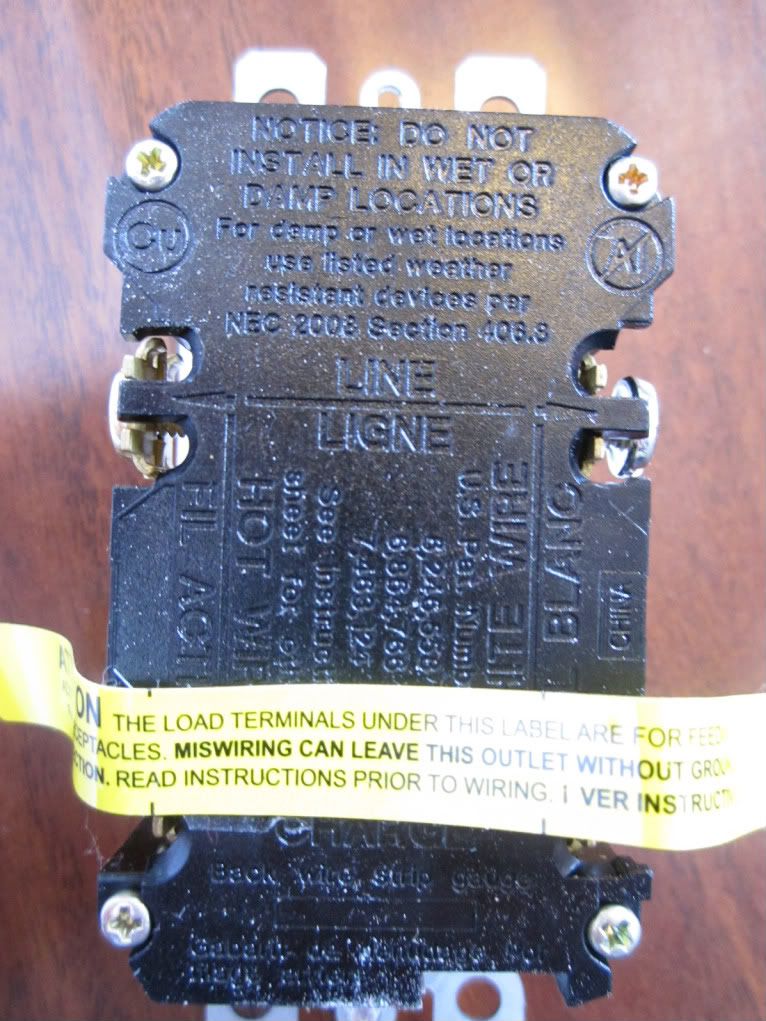
The black and white/gray wires will be inserted in the slots labeled "line", which are the two upper slots on this outlet. Your black wire will into the "hot wire" slot, on the left and the white/gray wire will go into the side labeled "white wire", on the right.
This outlet had a gold plate that you put the wire under so the wire sits between the outlet itself and the gold plate.

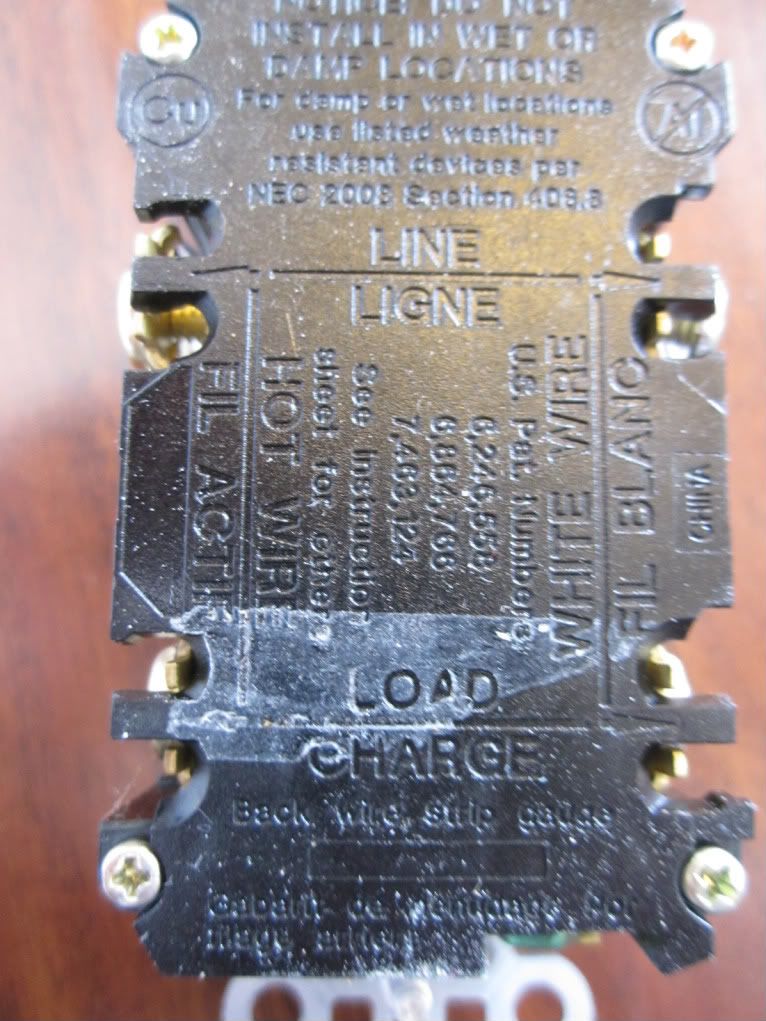
Here is a picture from a different angle. The arrow points to where the wire will go.

Here is the bottom of the outlet, where the bare wire will go.

5) Attach new outlet. Put the black wire in the "hot wire" side with the gold screw and tighten the screw.

Put the white/gray wire where it says "white wire" and tighten the silver screw.

And lastly put the bare wire into the bottom area and tighten the green screw.


6) Push outlet back into place. Gently fold back the wires into the box and secure the outlet with screws. You should not have to force the outlet into place.


7) Replace the face plate.

8) Turn your power back on.

The bathroom lights didn't work just from flipping that breaker switch. I had to push the reset button on this outlet near the circuit box and on the outlet I installed.


Now we are back in business. Hopefully you won't do anything silly like I did and have to replace an outlet, but in case you do, I hope this helps.
Linked to:
Tip Junkie
Linked to:
Tip Junkie
Thanks for the funny story and detailed tutorial!
ReplyDeleteMy goodness, that stinks! I would be a wreck if I did that, and I actually AM clumsy, so I definitely would do that! :) Sounds like you stayed grounded, though. Good work!
ReplyDeleteIt sounds like something I would do. That really stinks!
ReplyDeleteComing from a Master electrician you did an excelling job in detailing how to change that outlet. Well done. FYI, if the outlet under your panel turns off the outlet in your bath that you just replaced by hitting the test button on it. Then you didnt have to put in the more expensive GFI outlet. It would have already been protected by the one near your panel. A simple $1.00 outlet would have worked fine. In fact it is frowned upon by some inspectors to have two GFI outlets attached in series from line to load on one circuit. People commonly misunderstand that and think that everywhere there is water, ie. bath sink or kitchen counters the actual outlet has to be a GFI while in reality you only need one or two to protect the whole circuit.
ReplyDelete